
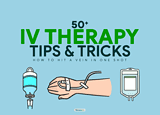
Intravenous (IV) therapy involves administering liquid substances directly into a vein, either intermittently or continuously, with the latter known as an intravenous drip. This method is the fastest route to deliver fluids and medications throughout the body, making it a cornerstone of modern healthcare.
Table of Contents
- What is Intravenous Therapy?
- Purposes of Intravenous (IV) Therapy
- Types of Intravenous Fluids
- Steps in Intravenous Therapy
What is Intravenous Therapy?
Intravenous therapy, often referred to as IV therapy, involves the direct infusion of liquids, such as medications or nutrients, into a vein. This method allows for rapid distribution of the substances throughout the body, making it a preferred route for many treatments.
Purposes of Intravenous (IV) Therapy
Intravenous (IV) therapy is a major component of modern medical treatment and serves various purposes, including:
- Maintaining or Restoring Fluid Balance. IV therapy is vital for rehydrating patients suffering from dehydration and maintaining fluid balance.
- Correcting Electrolyte Imbalances. It helps in the quick correction of electrolyte imbalances, ensuring proper cellular function.
- Delivering Medications. IV therapy allows for the direct administration of medications into the bloodstream, ensuring rapid or controlled therapeutic effects.
- Providing Hydration. For patients unable to consume fluids orally, IV therapy ensures they receive adequate hydration.
- Emergency Situations. In emergencies, IV therapy ensures the rapid delivery of medications and fluids, which can be lifesaving.
- Total Parenteral Nutrition (TPN). IV therapy provides essential nutrients to patients who cannot eat or absorb nutrients through their digestive system.
- Blood Transfusions. It is used to transfuse blood or blood products to patients experiencing significant blood loss or with hematologic conditions.
Types of Intravenous Fluids
There are two types of fluids that are used for intravenous drips; crystalloids and colloids.
See also: IV Fluids and Solution Cheat Sheet
Crystalloids
Crystalloids are aqueous solutions of mineral salts or other water-soluble molecules. The most commonly used crystalloid fluid is normal saline, a solution of sodium chloride at 0.9% concentration, which is close to the concentration in the blood (isotonic). Another isotonic solution often used for large-volume fluid replacement is Ringer’s lactate or Ringer’s acetate. If the patient is at risk for low blood sugar or high sodium, a solution of 5% dextrose in water, sometimes called D5W, is often used instead.
The choice of fluids may also depend on the chemical properties of the medications being given. Intravenous fluids must always be sterile. Crystalloids are commonly used for rehydration, and electrolyte replacement.
Colloids
Colloids contain larger insoluble molecules, such as gelatin; blood itself is a colloid. Colloids preserve a high colloid osmotic pressure in the blood, while, on the other hand, this parameter is decreased by crystalloids due to hemodilution. Another difference is that crystalloids generally are much cheaper than colloids. Colloids have large particles in them so they are not as easily absorbed into the vascular bed. Because of this property colloids are used to replace lost blood, maintain healthy blood pressure, and volume expansion.
Steps in Intravenous Therapy
Intravenous therapy involves a series of steps, divided into three phases: pre-catheterization, catheterization, and post-catheterization, each essential for ensuring effective and safe administration of IV fluids and medications.
Pre-Catheterization
Pre-catheterization involves several critical steps to ensure successful IV therapy, including reviewing the physician’s order, observing hand hygiene procedures, gathering necessary equipment, assessing and preparing the patient, and selecting the appropriate venipuncture site and vein dilation techniques.
1. Review Physician’s Order
A thorough review of the physician’s order is essential to initiate IV therapy correctly. The order should include the following details.
- Type of Solution. Specify the exact type of solution to be infused.
- Route of Administration. Indicate the precise route for administration.
- Medication Dosage. State the exact amount (dose) of any medications to be added, specifying whether this is per hour or a 24-hour total volume.
- Rate of Infusion. Define the rate at which the solution should be infused.
- Duration of Infusion. Specify the total time over which the infusion is to be completed.
- Physician’s Signature. Ensure the order is signed by the physician to validate and authorize the procedure.
2. Observe Hand Hygiene Procedures
Adhering to proper hand hygiene protocols is essential to prevent infections during IV therapy. Follow these guidelines for handwashing and hand antisepsis.
- Visible Contamination. Wash hands with either non-antimicrobial soap and water or antimicrobial soap and water when hands are visibly dirty or contaminated with blood or other body fluids.
- No Visible Soiling. If hands are not visibly soiled, use an alcohol-based hand rub to maintain cleanliness in all other clinical situations.
- Patient Contact. Decontaminate hands before having direct contact with patients.
- Nail Hygiene. Avoid wearing artificial fingernails or extenders when having direct contact with high-risk patients.
3. Gather Equipment
Prepare and gather the equipment needed for starting the IV.
- Verify Fluid Expiration. Always check and verify the expiration date of the fluid.
- Inspect Solution Container Integrity.
- Glass Containers. Hold up to light to check for cracks, clarity, particulate contamination, and expiration date.
- Plastic Containers. Squeeze to check for pinholes, clarity, particulate contamination, and expiration date.
- Inspect Administration Set. Ensure the set is appropriate for the procedure.
- Choose the Appropriate Set. Decide between vented or non-vented sets based on the type of fluid being administered.
- Gather Venipuncture and Dressing Supplies.
4. Patient Assessment and Psychological Preparation
Proper preparation of the patient, both physically and psychologically, is essential for a successful IV procedure. Follow these steps to ensure the patient is ready and informed.
- Introduce Yourself and Verify Identity. Ensure the patient knows who you are and confirm their identity.
- Provide Privacy. Maintain the patient’s dignity by ensuring privacy throughout the procedure.
- Explain the Procedure. Clearly explain the procedure to the patient, noting that while venipuncture may cause brief discomfort, there should be no discomfort once the solution is flowing.
- Evaluate Patient Preparedness. Discuss the procedure with the patient before assessing their veins to gauge their readiness and address any concerns.
Patient Information to Consider
- Medical Diagnosis. Take into account the patient’s medical condition.
- Chronic Diseases. Consider any history of chronic diseases that may increase the risk of complications.
- Vasovagal Reactions. Be aware of any history of fainting or reactions to venipuncture or blood.
- Previous Vascular Access Devices. Check if the patient has had vascular access devices previously.
- Post-Procedure Plans. Determine if the patient will be going home with the catheter.
- Cultural Barriers. Address any cultural or language barriers by taking extra time, speaking clearly and slowly, using pictures, keeping messages simple, and utilizing an interpreter if necessary.
- Vein Assessment. Evaluate both arms and hands before selecting the appropriate vein.
- Site Selection. Choose the lowest and best site based on the catheter size and type of therapy.
- Allergy Assessment. Check for any allergies to tape, povidone-iodine, latex, or other materials.
- Vital Signs. Record baseline vital signs for reference.
- Skin Turgor. Assess the skin’s elasticity to help determine hydration status.
- Bleeding Tendencies. Evaluate for any bleeding disorders.
- Extremity Health. Assess for any disease or injury to the arms and hands.
- Vein Status. Determine the condition of the veins to select the best venipuncture site.
5. Site Selection and Vein Dilation
Careful consideration of various factors is crucial before initiating venipuncture to ensure successful IV therapy.
Factors to Consider
- Type of Solution. Be mindful of hypertonic solutions and medications, as they can irritate the vein.
- Condition of Vein. Select a soft, straight, and bouncy vein. Avoid veins that feel like a cat’s tail and those near previously infected areas.
- Duration of Therapy. Choose a vein that can support IV therapy for 72–96 hours.
- Catheter Size. Use the smallest gauge possible to ensure proper hemodilution.
- Patient Age. Elderly and pediatric patients require additional assessment and careful management during insertion.
- Patient Activity. For ambulatory patients using crutches or walkers, place the catheter above the wrist.
- Presence of Disease or Surgery. Avoid areas with poor vascular return due to conditions like mastectomy or stroke.
- Presence of Shunts or Grafts. Do not use limbs with patent grafts or shunts for dialysis.
- Anticoagulation Therapy. Be cautious with patients on anticoagulants to prevent bleeding complications. Use minimal tourniquet pressure and care when removing dressings.
- Patient Allergies. Identify allergies to medications, foods, animals, and environmental substances. Avoid using iodine or latex if the patient is allergic.
Vein Dilation Techniques
- Tourniquet. Use a latex or non-latex tourniquet, placed 6–8 inches above the venipuncture site. Adjust position based on blood pressure.
- Gravity. Position the extremity lower than the heart.
- Fist Clenching. Instruct the patient to open and close their fist repeatedly.
- Vein Tapping. Gently flick the vein with your thumb and second finger to release histamines and cause dilation. Avoid slapping the vein.
- Warm Compresses. Apply for a maximum of 10 minutes. Do not use a microwave to heat the compress.
- Blood Pressure Cuff. Inflate to 30 mmHg, which is effective for fragile veins.
- Multiple Tourniquet Technique. Use 2 to 3 tourniquets, applying one high on the arm for 2 minutes, then a second at mid-arm below the antecubital fossa, and a third if needed.
Tips for Selecting Veins
- Suitable Vein Characteristics. Choose veins that feel smooth and pliable, with well-spaced valves.
- Distal to Proximal Approach. Start with distal veins and work proximally.
- Avoid Bumpy Veins. Veins that feel bumpy are usually thrombosed or valvular and difficult to stabilize.
- Sclerotic Veins. Common among people with drug addiction, these veins require careful assessment.
- Patients Undergoing Dialysis. They often know which veins are best for venipuncture. Consult with them when needed.
Catheterization
Catheterization is the second phase in IV therapy, involving several precise steps to ensure successful insertion and maintenance of the catheter. These steps include needle selection, wearing gloves, site preparation, catheter insertion, and catheter stabilization and dressing management.
1. Needle Selection
Catheters come in various sizes, known as gauges. Smaller gauge numbers indicate thicker catheters, which allow for faster administration of medication and blood. However, thicker catheters can cause more pain upon insertion, so selecting the appropriate size is crucial. Inspect the catheter tip for integrity before use and limit attempts at venipuncture to two.
- 14G (Orange): Used in massive trauma situations.
- 16G (Gray): Suitable for trauma, surgeries, or multiple large-volume infusions.
- 18G (Green): Ideal for blood transfusions or large volume infusions.
- 20G (Pink): Multi-purpose IV for medications, hydration, and routine therapies.
- 22G (Blue): Commonly used for most chemo infusions, patients with small veins, elderly, or pediatric patients.
- 24G (Yellow): Best for very fragile veins, elderly, or pediatric patients.
2. Don your gloves
Wearing gloves is mandatory to protect both the healthcare provider and the patient. The risk of blood contact is high, especially for less experienced personnel. If there is a high risk of blood splatter, consider additional protective gear such as face and eye protection and a gown. Maintain proper hand hygiene before donning sterile gloves, and replace any compromised gloves immediately.
3. Site Preparation
After donning your gloves, proceed with preparing the insertion site to ensure it is properly sanitized.
- Apply Antimicrobial Solution. Use an antimicrobial solution, working from the center outward in a circular motion, covering an area of 2-3 inches for at least 20 seconds. Apply enough friction to effectively clean the site.
- Avoid Shaving. Shaving can cause micro-abrasions that increase the risk of infection. Instead, remove hair with scissors or clippers.
- Avoid Depilatories. Depilatories are not recommended due to the potential for allergic reactions.
- Avoid Using 70% Isopropyl Alcohol After Povidone-Iodine. Do not apply 70% isopropyl alcohol after povidone-iodine as it negates the antimicrobial effect of the povidone-iodine.
- Cleanse the Insertion Site with an Appropriate Solution. Choose one of the following solutions for cleansing:
- 2% Chlorhexidine Gluconate (Preferred).
- Iodophor (Povidone-Iodine).
- 70% Isopropyl Alcohol.
- Tincture of Iodine 2%.
4. Insertion of Catheter into Vein
Follow these steps to ensure the successful insertion of the catheter into the vein:
1. Position the Extremity.
Place the patient’s extremity in a dependent position, meaning lower than their heart. This position uses gravity to slow venous return and distend the veins, which makes it easier to insert the needle properly. Proper positioning is essential as it helps in visualizing and accessing the vein, reducing the risk of complications and improving the success rate of the venipuncture.
2. Apply the Tourniquet.
Firmly apply a tourniquet 15 to 2 cm above the venipuncture site. Ensure the tourniquet is tight enough to occlude venous flow but not so tight that it obstructs arterial flow, as obstructing arterial flow inhibits venous filling. Confirm adequate tourniquet application by checking for a palpable radial pulse. Inform the patient that the tourniquet will feel tight, which is necessary to enhance vein visibility and accessibility. If the vein is not easily palpable, you can use additional techniques:
- Vein Stimulation. Massage or stroke the vein distal to the site, encouraging blood flow. Have the patient clench and unclench their fist to compress the distal veins and distend them. Lightly tap the vein with your fingertips to further distend it.
- Warm Compress. If the vein is still not palpable, remove the tourniquet and apply a warm, moist towel to the extremity for 10-15 minutes to dilate superficial blood vessels. Repeat the process as needed.
3. Put on Clean Gloves and Clean the Site.
Don clean gloves to protect against contamination. Clean the venipuncture site using a topical antiseptic swab, moving from the center outward in a circular motion for several inches. This method effectively removes microorganisms from the site. Allow the antiseptic solution to dry on the skin, as drying enhances its antimicrobial efficacy. If using povidone-iodine, ensure it remains in contact with the skin for at least one minute to be effective. Always check for patient allergies to antiseptics before application to avoid adverse reactions.
4. Stabilize the Vein.
Use your nondominant hand to pull the skin taut below the entry site. This maneuver stabilizes the vein and makes the skin taut, facilitating needle entry and reducing initial tissue penetration pain. Stabilizing the vein also prevents it from rolling during needle insertion, increasing the likelihood of a successful puncture.
5. Insert the Catheter.
Hold the over-the-needle catheter at a 15- to 30-degree angle with the bevel facing up. Insert the catheter smoothly through the skin and into the vein. Avoid jabbing, stabbing, or quick thrusting movements, as these can rupture delicate veins and cause unnecessary pain to the patient. A controlled and steady insertion technique minimizes tissue trauma and enhances patient comfort.
6. Advance the Catheter.
Once you observe blood appearing in the lumen or feel a lack of resistance, lower the angle of the catheter until it is almost parallel with the skin. Advance the catheter approximately 1 cm further into the vein. This step ensures that the catheter, not just the needle, is properly positioned within the vein, allowing for effective infusion.
7. Advance the Catheter Hub.
Keeping the needle steady, continue to advance the catheter until the hub is at the venipuncture site. This step secures the catheter in place and ensures it remains stable during the infusion process.
8. Release the Tourniquet and Apply Pressure.
Apply pressure on the vein proximal to the catheter to reduce blood oozing. Stabilize the hub with your thumb and index finger of the nondominant hand.
9. Remove the Protective Cap.
Remove the protective cap from the distal end of the tubing, keeping it sterile and ready to attach to the catheter.
10. Remove the Needle.
Carefully withdraw the needle, engaging the needle safety device to prevent accidental needle sticks. Immediately attach the infusion tubing to the catheter hub to maintain a closed system and reduce the risk of contamination.
11. Initiate the Infusion and Tape the Catheter.
Tape the catheter using the “U” method or according to the manufacturer’s instructions, using three strips of tape (about 3 inches long).
12. Dress and Label the Site.
Dress and label the venipuncture site and tubing according to agency policy. The label should include the date the administration set must be changed, as well as the date and time of insertion, and the type and length of the catheter. For more details, see next step.
13. Document the Procedure.
Document all relevant data, including assessments, to ensure proper records are maintained.
5. Catheter Stabilization and Dressing Management
Proper stabilization and dressing of the catheter are crucial to ensure secure placement while allowing for ongoing visualization and assessment. Follow these steps to achieve effective catheter stabilization and dressing management:
- Tape the Catheter. Secure the catheter using the U, H, or Chevron method, or follow the manufacturer’s instructions. Use three strips of tape, each about 3 inches long, to ensure the catheter is firmly anchored. This helps prevent displacement and maintains a stable IV access point.
- Loop and Secure the Tubing. Carefully loop the IV tubing and secure it with tape. This technique prevents the weight of the tubing or any patient movements from exerting undue pressure on the needle or catheter, reducing the risk of dislodgement and ensuring consistent medication delivery.
- Dress the Venipuncture Site and Tubing. Dress the venipuncture site and tubing according to your agency’s policy. Proper dressing not only protects the insertion site from infection but also allows for easy monitoring and assessment.
Types of Dressings for Peripheral Catheters
- Gauze Dressing with Tape. Traditional method providing good protection.
- Transparent Semipermeable Dressing (TSM). Allows for continuous visualization of the insertion site, facilitating easy monitoring for signs of infection or complications.
Standards of Practice
- Gauze Dressings. Change gauze dressings every 48 hours on peripheral sites to maintain cleanliness and prevent infection.
- Non-Occlusive Adhesive Bandage Strips. Avoid using these in place of proper dressings, as they do not provide adequate protection.
- TSM Dressings. These can be changed when the catheter is changed, offering a more durable and hygienic option.
Post-Catheterization
Post-catheterization is the final step in intravenous therapy, focusing on ensuring the proper function of the IV, preventing complications, and educating the patient. The following steps outline the essential tasks for effective post-catheterization management:
1. Labeling
Proper labeling of the insertion site, administration set, and solution container is essential for accurate record-keeping and patient safety.
- Insertion Site. Label the venipuncture site with the date and time of insertion, type and length of the catheter, and the nurse’s initials.
- Administration Set. Label according to agency policy, including the date on which the administration set must be changed.
- Solution Container. Place a time strip on all parenteral solutions and ensure any additives are clearly labeled on the bag.
2. Equipment Disposal
Proper disposal of equipment is critical for maintaining a safe environment and preventing contamination.
- Needles and Stylets. Dispose of all needles and stylets in non-permeable, tamper-proof containers to ensure safety and prevent needle-stick injuries.
- Paper and Plastic Equipment. Dispose of all used paper and plastic equipment in a designated biohazard container to ensure proper handling of medical waste and prevent contamination.
3. Patient Education
Comprehensive patient education is essential to ensure the patient understands their care and can identify potential complications. After the catheter is stabilized, the dressing is applied, and labeling is complete, provide the following information:
- Movement and Mobility Limitations. Inform the patient about any restrictions on movement or mobility to prevent dislodging the catheter.
- Alarms Explanation. If an Electronic Infusion Device (EID) is used, explain all alarms to the patient so they understand their function and importance.
- When to Seek Assistance. Instruct the patient to call for assistance if the venipuncture site becomes tender, sore, red, or swollen, as these may be signs of infiltration or complications.
- Monitoring Schedule. Advise the patient that the site will be checked every shift by the nurse to monitor for any issues and ensure ongoing care.
4. Rate Calculation
Accurate rate calculation is essential to ensure the proper infusion flow and patient safety.
- Verify Infusion Flow. Carefully calculate and verify the appropriate infusion flow rate based on the physician’s orders and the patient’s needs.
- Adjust and Confirm. Adjust the infusion rate as necessary and confirm it is functioning correctly before leaving the patient care environment. This ensures the patient receives the correct dosage and helps prevent potential complications.
5. Documentation
Thorough and accurate documentation is critical for ensuring high-quality patient care and maintaining legal records. Ensure that all relevant data and assessments are meticulously recorded.
- Start of Infusion. Record the exact date and time the infusion begins on the patient’s chart.
- Venipuncture Details. Include comprehensive details about the venipuncture. Document the gauge and length of the device, the specific name and location of the accessed vein, and the number of venipuncture attempts along with the location of each attempt.
- Solution Information. Document the amount of solution used, any additives included, and the container number for tracking purposes.
- Flow Rate. Note the calculated flow rate to ensure the patient receives the correct dosage as prescribed.
- Needle or Catheter Details. Specify the type, length, and gauge of the needle or catheter used.
- Dressing Applied. Record the type of dressing applied to the venipuncture site.
- Patient Response. Observe and document the patient’s general response to the procedure, noting any immediate reactions or complications.
- Nurse’s Signature. Ensure your signature is included to authenticate the documentation and maintain accountability.
Intravenous (IV) therapy is essential for effective and efficient delivery of medications, fluids, and nutrients. By following meticulous procedures during pre-catheterization, catheterization, and post-catheterization phases, healthcare professionals can ensure patient safety and optimal outcomes. Proper documentation, patient education, and continuous monitoring are crucial for minimizing complications and enhancing recovery. IV therapy remains a cornerstone of modern medical treatment, significantly contributing to patient health and well-being. We hope this guide was helpful to you in understanding and implementing IV therapy best practices.


Leave a Comment