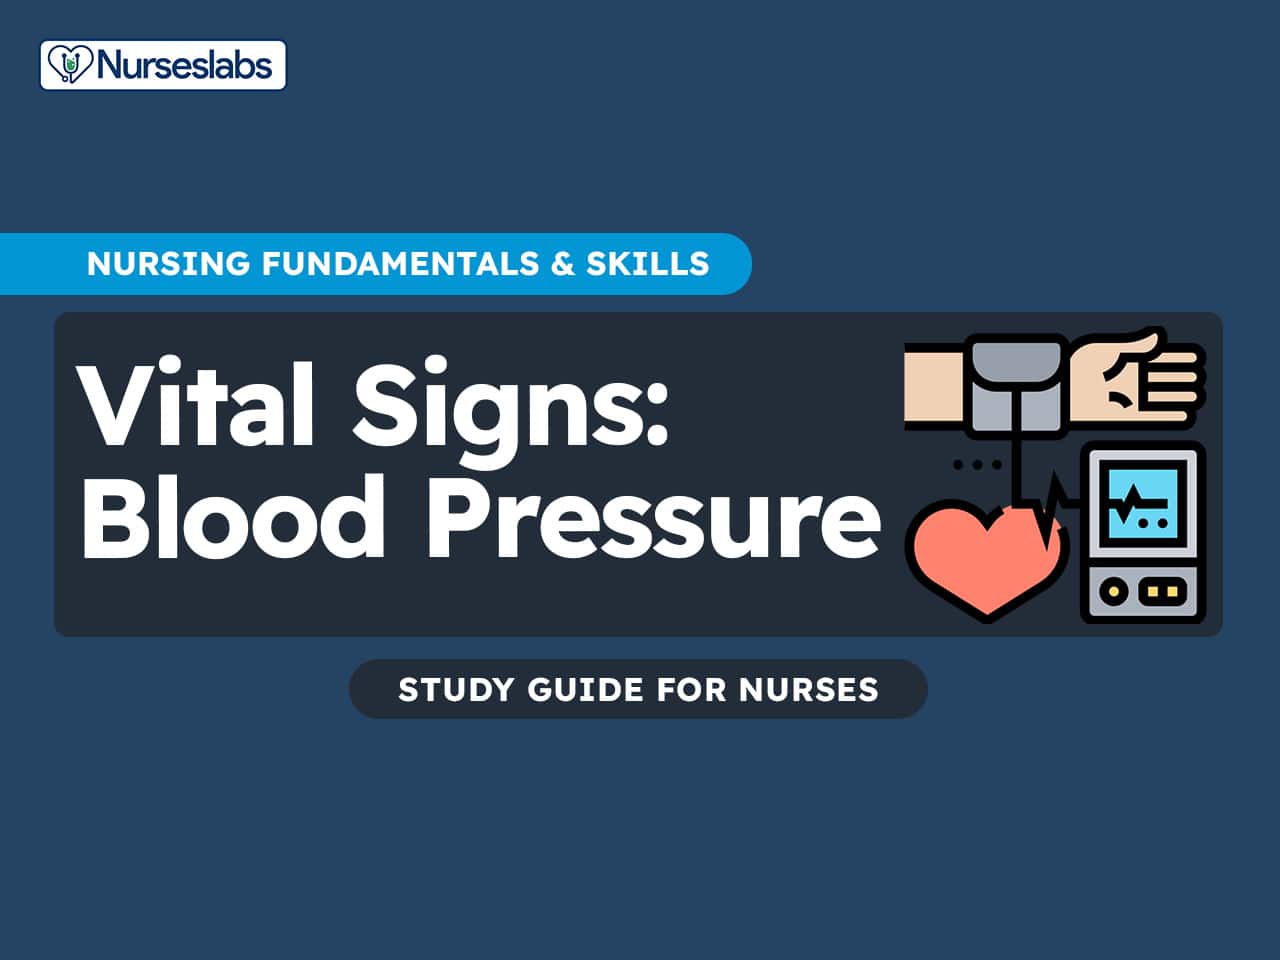
Monitoring blood pressure provides essential information about a person’s cardiovascular status and helps detect issues like high or low blood pressure before they cause serious problems. Readings can vary with activity, stress, or medical conditions, so accuracy and proper technique are necessary for safe care. Different methods are available, including manual auscultation with a stethoscope, the palpatory method for situations where sounds are hard to detect, and automated devices for quick, repeatable checks. Some patients need special methods like Doppler ultrasound or 24-hour ambulatory monitoring for more precise data. This guide will help you choose the right method and carry out each step confidently and correctly.
What is Blood Pressure?
Blood Pressure (BP) is the force exerted by circulating blood on the walls of the arteries. It is typically measured as two values: systolic (pressure during heart contraction) and diastolic (pressure during heart relaxation). For example, a BP of 120/80 mmHg means a systolic pressure of 120 mmHg and diastolic of 80 mmHg. This vital sign is crucial because it reflects how well the heart is pumping and how elastic the arteries are, indicating overall cardiovascular health and tissue perfusion. Nurses measure BP to establish a baseline, monitor a patient’s hemodynamic status, and detect changes that might signal health issues or response to treatments. In essence, BP provides insight into cardiac output and vascular resistance; consistently abnormal BP can indicate conditions like hypertension (high BP) or hypotension (low BP), each carrying its own risks if unaddressed.
Importance of Monitoring Blood Pressure
Monitoring blood pressure is one of the most critical aspects of assessing a person’s overall cardiovascular health and guiding medical care. Accurate and regular BP checks help identify potential problems early, prevent serious complications, and support effective treatment plans. Here’s an expanded list of key reasons why monitoring blood pressure (BP) is important:
1. Early Detection of Hypertension
Regular BP monitoring helps detect high blood pressure (hypertension) early, often before symptoms appear. Hypertension is called the “silent killer” because it can cause damage to the heart, brain, kidneys, and blood vessels for years without obvious signs. Early detection allows for timely interventions, lifestyle changes, and treatment to prevent complications.
2. Prevention of Cardiovascular Events
High BP is a major risk factor for heart disease, stroke, heart attack, and heart failure. Monitoring BP enables healthcare providers to assess a patient’s cardiovascular risk and implement measures to reduce it. Keeping BP within a healthy range significantly lowers the chances of life-threatening events.
3. Monitoring Response to Treatment
For patients already diagnosed with hypertension or cardiovascular conditions, regular BP checks are essential to evaluate the effectiveness of prescribed medications or lifestyle changes. Tracking BP trends helps clinicians adjust treatment plans to ensure that the patient’s BP remains controlled and target goals are met
4. Detecting Hypotension and Other Conditions
Low blood pressure (hypotension) can also pose health risks, such as dizziness, fainting, or inadequate organ perfusion. Monitoring BP helps identify hypotension or sudden drops in BP due to dehydration, medication side effects, blood loss, or other underlying conditions.
5. Guiding Clinical Decision-Making
Accurate BP readings are used to guide important clinical decisions, including medication adjustments, fluid management, and planning procedures or surgeries. Knowing a patient’s BP status ensures safe and effective care, especially for patients with complex health needs.
Normal Regulation and Control (Cardiac Output, Peripheral Resistance)
Blood pressure is regulated by a dynamic balance between cardiac output (CO) and peripheral vascular resistance (PVR). Cardiac output is the amount of blood the heart pumps per minute and is determined by heart rate and stroke volume (the amount of blood ejected with each heartbeat). When cardiac output increases—for example, during exercise or stress—blood pressure typically rises to meet the body’s increased oxygen demands.
Peripheral resistance, on the other hand, is the resistance the blood encounters as it flows through the small arteries and arterioles. This resistance is influenced by the diameter of the blood vessels—when vessels constrict (vasoconstriction), resistance increases and blood pressure rises; when vessels dilate (vasodilation), resistance decreases and blood pressure drops.
The body’s nervous and endocrine systems, including the autonomic nervous system and hormones like adrenaline and angiotensin II, help control these factors to keep BP within a healthy range. Together, cardiac output and peripheral resistance maintain blood flow and ensure that tissues receive enough oxygen and nutrients under varying conditions.
Components of Blood Pressure (Systolic and Diastolic)
Blood pressure is composed of two key measurements that together reflect the force of blood moving through the arteries. Understanding these components is essential for interpreting cardiovascular health and detecting potential problems. Below are the two main components of blood pressure and what they represent:
Systolic Pressure
Systolic pressure is the maximum pressure exerted on the arterial walls when the heart’s ventricles contract and push blood out into the circulation. It reflects how much pressure the blood is placing against the artery walls at the peak of each heartbeat. A higher systolic reading can indicate increased workload on the heart or narrowed arteries.
Diastolic Pressure
Diastolic pressure is the minimum pressure in the arteries when the heart’s ventricles are at rest and filling with blood between beats. It represents the constant pressure that blood exerts on the arterial walls during cardiac relaxation. Elevated diastolic pressure can suggest persistent vascular resistance, while low diastolic values may signal poor vascular tone or excessive dilation.
Mean Arterial Pressure (MAP)
Mean arterial pressure (MAP) is an important hemodynamic parameter that represents the average pressure in a person’s arteries during one cardiac cycle. It provides a better understanding of the perfusion pressure seen by the organs of the body than either systolic or diastolic pressure alone.
How to Compute MAP
There are several methods to calculate Mean Arterial Pressure (MAP). One commonly used and straightforward formula is: by multiplying the diastolic blood pressure to two, add it to the systolic blood pressure, and then divide the sum by 3.
\text{Mean Arterial Pressure (MAP)} = \frac{\text{Systolic BP} + (2 \times \text{Diastolic BP})}{3}For example:
If a patient has a blood pressure of 120/80 mmHg:
\text{MAP} = \frac{120 + (2 \times 80)}{3}
Multiply the diastolic blood pressure by two:
\text{MAP} = [120 + 160] / 3Add the systolic and diastolic blood pressure:
\text{MAP} = \frac{280}{3} \\For the result:
\text{MAP} = 93.33 \, \text{mmHg}
Normal Range of MAP
The normal range for MAP is typically between 70 and 100 mmHg. Maintaining MAP within this range is important for perfusion of vital organs such as the brain, kidneys, and heart. Values below this range may indicate insufficient blood flow, while values above may indicate excessive pressure on the blood vessels and organs.
Abnormal MAP
Abnormal MAP levels can signal serious circulatory problems that require prompt attention. Below are key considerations when MAP is too low or too high:
- Low MAP (< 70 mmHg). May suggest hypoperfusion, potentially leading to organ dysfunction and failure.
- High MAP (> 100 mmHg). May indicate hypertension, increasing the risk for cardiovascular events and end-organ damage.
Determinants of Blood Pressure
Blood pressure is determined by a combination of several physiological factors that influence the force and volume of blood against the arterial walls. Understanding these determinants helps in comprehending the underlying mechanisms that regulate blood pressure and the potential causes of hypertension or hypotension. The primary determinants of blood pressure include:
1. Cardiac Output. The amount of blood the heart pumps per minute. Cardiac output is the product of heart rate (HR) and stroke volume (SV), where stroke volume is the amount of blood pumped with each beat. Increased cardiac output raises blood pressure, while decreased cardiac output lowers it.
2. Peripheral Resistance (PR). The resistance to blood flow offered by the blood vessels, primarily the arterioles. Factors affecting PR include vessel diameter (vasoconstriction increases resistance, vasodilation decreases resistance), blood viscosity, and vessel length. Increased peripheral resistance elevates blood pressure, whereas decreased resistance reduces it.
3. Blood Volume. The total amount of blood circulating within the vascular system. Higher blood volume increases blood pressure by raising the amount of blood returning to the heart, while lower blood volume decreases blood pressure.
4. Blood Viscosity. The thickness or stickiness of the blood. Higher viscosity (e.g., due to increased red blood cell count) increases peripheral resistance and therefore raises blood pressure. Lower viscosity reduces resistance and lowers blood pressure.
5. Elasticity of Arterial Walls. The ability of the arteries to expand and contract with each heartbeat. Healthy, elastic arteries help buffer the pressure changes. Loss of elasticity (as in arteriosclerosis) leads to higher systolic pressure and potentially higher overall blood pressure.
6. Neural Factors. The sympathetic nervous system (SNS) increases heart rate and vasoconstriction, raising blood pressure, while the parasympathetic nervous system (PNS) decreases heart rate, lowering blood pressure.
7. Hormonal Factors
- Renin-Angiotensin-Aldosterone System (RAAS). Regulates blood volume and systemic vascular resistance, influencing blood pressure. Angiotensin II causes vasoconstriction, and aldosterone increases sodium and water retention, both raising blood pressure.
- Antidiuretic Hormone (ADH). Promotes water retention by the kidneys, increasing blood volume and pressure.
- Adrenaline and Noradrenaline. Released from the adrenal medulla, these hormones increase heart rate and vasoconstriction, raising blood pressure.
8. Renal Regulation. The kidneys regulate blood pressure through the control of blood volume (via excretion or retention of
Key Factors Influencing Blood Pressure
Blood pressure is influenced by a range of internal and external factors that can cause it to rise or fall. These factors include physical, physiological, and lifestyle elements that affect how hard the heart works and how blood moves through the vessels. Below is a clear summary of common factors and how each affects BP:
| Factor | Explanation |
|---|---|
| Age | Blood vessels stiffen with age, raising peripheral resistance and BP. Children generally have lower BP than adults. |
| Gender | Men usually have higher BP than women before midlife; post-menopausal women often have higher BP due to decreased estrogen. |
| Activity and Exercise | Physical exertion raises BP temporarily but lowers baseline BP over time by improving heart and vessel health. |
| Emotions and Stress | Fear, anxiety, stress, or pain trigger the sympathetic nervous system, increasing heart rate and vasoconstriction, which raises BP. |
| Body Position | BP is typically lower when lying down and higher when sitting or standing because of gravity’s effect on blood flow and vessel tone. |
| Medications | Antihypertensives, diuretics, and sedatives lower BP; stimulants, decongestants, or NSAIDs may increase BP. |
| Time of Day | BP dips during sleep and is lowest in early morning, rising throughout the day and peaking in late afternoon or evening due to natural circadian rhythms. |
| Smoking and Alcohol | Nicotine causes vasoconstriction, raising BP; excessive or chronic alcohol use can elevate BP long-term. |
| Body Weight | Excess weight increases blood volume and cardiac workload, often resulting in higher BP. |
| Illness/Health Conditions | Fever, infections, pain, or chronic diseases (e.g., heart failure, kidney disease) alter fluid balance, cardiac output, or vessel resistance, affecting BP. |
| Temperature | Fever raises metabolic rate and cardiac output, often increasing BP; prolonged cold exposure can cause vasoconstriction, raising BP temporarily. |
| Pain | Acute pain activates the sympathetic nervous system, causing vasoconstriction and a rise in BP; untreated severe pain may keep BP elevated. |
| Dietary Factors | High sodium intake raises BP by increasing fluid retention; a balanced diet rich in potassium, calcium, and low in processed foods can help maintain normal BP. |
What is a Normal Blood Pressure?
The American Heart Association typically defines normal blood pressure as a systolic pressure of less than 120 millimeters of mercury (mmHg) and a diastolic pressure of less than 80 mmHg. This is often expressed as 120/80 mmHg. Maintaining blood pressure within this range is helps in reducing the risk of cardiovascular diseases, including heart attack, stroke, and kidney problems. Blood pressure readings consistently above or below this range may indicate hypertension or hypotension, respectively, and require medical evaluation and management to prevent complications.
Blood Pressure Ranges (Adults)
Blood pressure ranges help classify whether an adult’s BP is within a healthy limit or if intervention may be needed. These categories guide diagnosis and treatment of hypertension and hypotension. Below is a breakdown of the standard blood pressure ranges for adults:
| Category | Systolic (mm Hg) | Diastolic (mm Hg) |
|---|---|---|
| Normal | <120 | <80 |
| Elevated | 120–129 | <80 |
| Hypertension Stage 1 | 130–139 | 80–89 |
| Hypertension Stage 2 | ≥140 | ≥90 |
| Hypertensive Crisis | >180 | >120 |
Types and Methods of Blood Pressure Measurement
Blood pressure can be measured using several techniques, each suited to different clinical circumstances and patient needs. Understanding these methods helps ensure accurate readings, promotes patient safety, and guides appropriate treatment decisions. Below are the main types of blood pressure measurement methods commonly used in clinical practice:
1. Manual Auscultation (Korotkoff Sounds)
This is the traditional and gold-standard method for measuring blood pressure. It involves using a sphygmomanometer (BP cuff) and a stethoscope to listen for Korotkoff sounds, which are the distinct sounds produced as blood begins to flow through the compressed artery. The first sound heard indicates the systolic pressure, while the point at which the sounds disappear marks the diastolic pressure. This method requires skill, a quiet environment, and careful technique to ensure accuracy and is widely taught to healthcare professionals.
2. Automated BP Monitoring
Automated electronic devices are now common in both hospital and home settings. These machines inflate the cuff automatically and detect blood flow vibrations or oscillations to calculate systolic and diastolic pressures. Automated monitors are convenient for quick, repeatable readings and reduce human error. However, they may be less reliable in patients with irregular heartbeats, so manual confirmation is sometimes necessary.
3. Palpation Method
The palpatory method is an alternative when Korotkoff sounds are difficult to hear, such as in noisy environments or with certain patient conditions. In this method, the cuff is inflated while the examiner feels for the radial or brachial pulse. The pressure at which the pulse reappears during deflation is recorded as the systolic pressure. This technique does not provide a diastolic reading but is useful for estimating systolic BP quickly.
4. Doppler Method
The Doppler method uses an ultrasound Doppler device to detect blood flow sounds, making it helpful when pulses are weak or difficult to palpate, such as in patients with poor peripheral circulation, hypotension, or in pediatric care. A conducting gel is applied, and the Doppler probe amplifies the sound of blood flow, allowing the examiner to detect the return of blood flow as the cuff deflates. This method provides a reliable systolic reading when traditional auscultation fails.
5. Ambulatory and Home BP Monitoring
Ambulatory blood pressure monitoring (ABPM) involves wearing a portable device that takes BP readings at regular intervals over 24 hours. This method helps detect white coat hypertension, monitor BP variability, and evaluate treatment effectiveness. Home BP monitoring allows patients to track their blood pressure regularly outside the clinical setting, providing valuable data for long-term management. Both methods empower patients and support accurate diagnosis by capturing BP changes throughout daily activities.
Below is a clear comparison table for the types of blood pressure measurements, summarizing each method with its key points, advantages, and limitations.
| Method | Description | Advantages | Limitations |
|---|---|---|---|
| Manual Auscultation | Uses sphygmomanometer and stethoscope to listen for Korotkoff sounds. | Gold standard; accurate when done correctly; allows assessment of both systolic & diastolic BP. | Requires skill, training, and a quiet environment; can be hard with faint sounds or noisy settings. |
| Automated BP Monitoring | Uses electronic device to detect BP via oscillometric method. | Quick, easy, good for repeated readings; reduces observer error; ideal for self-monitoring. | Can be inaccurate with arrhythmias or improper cuff placement; calibration needed. |
| Palpation Method | Feel for return of pulse while deflating cuff to estimate systolic pressure only. | Useful when sounds are inaudible; simple; requires minimal equipment. | No diastolic value obtained; less precise; not suitable for routine full BP assessment. |
| Doppler Method | Uses ultrasound probe to detect blood flow sounds when pulses are weak. | Good for low BP, poor perfusion, children, or obese arms; more sensitive than palpation alone. | Provides only systolic pressure; requires Doppler device and gel; needs practice. |
| Ambulatory/Home Monitoring | Wearable device for 24-hour or home BP checks outside clinical setting. | Detects white coat hypertension; shows daily BP patterns; empowers patient self-management. | More costly; patient must follow instructions; potential discomfort wearing the cuff repeatedly. |
Step-by-Step Guide to Measuring Blood Pressure
Measuring blood pressure accurately is an essential nursing skill used to assess a patient’s cardiovascular health. A clear, step-by-step approach ensures reliable readings and helps identify potential hypertension or hypotension. This guide outlines the proper technique to promote patient safety and accurate documentation.
1. Manual Blood Pressure Measurement (Auscultatory Method)
This traditional method uses a sphygmomanometer (an inflatable cuff and a manometer) and a stethoscope. The healthcare provider inflates the cuff around the patient’s upper arm to temporarily stop blood flow in the brachial artery, then slowly releases the pressure while listening for Korotkoff sounds through the stethoscope. The first sound heard indicates the systolic pressure, and the point at which the sounds disappear marks the diastolic pressure. Manual measurement requires proper technique and is valued for its accuracy when performed correctly. Below are the steps for assessing blood pressure manually:
1. Verify any provider orders for BP monitoring and gather equipment.
Verifying provider orders ensures the nurse understands the frequency and specific requirements for blood pressure monitoring, which may vary based on the patient’s condition.
2. Collect a properly sized BP cuff, an aneroid or mercury sphygmomanometer, and a stethoscope.
Gathering the appropriate equipment—such as the correct cuff size, stethoscope, and sphygmomanometer—helps ensure an accurate reading and prevents delays in care. Proper preparation supports patient safety and demonstrates adherence to evidence-based practice. Having reliable, calibrated equipment reduces measurement errors.
3. Wash hands to maintain infection control.
Hand hygiene is a fundamental infection control measure that helps prevent the spread of microorganisms between the nurse and the patient.
4. Ensure the patient is comfortable and provide privacy.
Ensuring the patient is comfortable and providing privacy promotes trust, relaxation, and cooperation, which are essential for obtaining an accurate blood pressure reading. A calm, respectful environment also reduces patient anxiety, which can otherwise falsely elevate blood pressure results.
5. Introduce yourself and identify the patient using two identifiers (e.g., name and birthdate or wristband) to ensure the correct patient.
Introducing yourself establishes rapport and helps build trust, which encourages patient cooperation during the procedure. Using two patient identifiers, such as name and date of birth or a wristband, is a critical safety step to confirm you have the correct patient and to prevent medical errors. This practice aligns with national patient safety goals and supports safe, effective nursing care.
6. Explain the procedure to the patient in simple terms (e.g., “I’m going to check your blood pressure by wrapping this cuff on your arm. It will squeeze your arm for a short time.”). This helps gain cooperation and alleviates anxiety.
7. Have the patient sit or lie down. The arm should be bare, supported at heart level, with palm facing up and feet flat on the floor (if sitting).
Have the patient sit or lie in a comfortable position. If sitting, make sure the back is supported and the feet are flat on the floor (no crossed legs). The arm should be slightly flexed, with the palm facing up, and supported at heart level (resting on a table or armrest). If the patient is supine in bed, position the arm on a pillow so it’s at heart level. An unsupported arm can cause a false high reading (due to muscle tension). Ensure the patient is relaxed; if they have been active, allow a few minutes of rest before measurement. Improper positioning can alter BP. A supported arm at heart level avoids hydrostatic pressure effects. Crossed legs or unsupported arms can skew readings.
8. Wrap the cuff snugly around the upper arm, with the lower edge about 1 inch (2–3 cm) above the antecubital fossa. Align the cuff’s artery marker with the brachial artery.
Expose the upper arm and locate the brachial artery in the antecubital fossa (inner elbow). Wrap the deflated cuff evenly and snugly around the upper arm, with the cuff’s center (bladder midpoint) over the brachial artery. The lower edge of the cuff should be ~1 inch above the elbow crease to allow room for the stethoscope. Check that the cuff size is appropriate (the artery index line falls within the range on the cuff). A loose or improperly placed cuff can lead to errors (too loose can yield falsely high readings).
9. Palpate the brachial pulse and inflate cuff (preliminary palpatory reading).
Before using the stethoscope, palpate the brachial artery with your fingertips. Close the bulb valve and inflate the cuff by pumping the bulb while continuing to feel the brachial pulse. Note the point on the gauge at which the pulse is no longer felt—this is an approximate systolic pressure level. Continue inflating 20–30 mmHg beyond this point to ensure the artery is fully occluded. Then slowly deflate the cuff and wait ~30 seconds. This palpatory method serves two purposes: (a) it provides an estimated systolic BP so you know how high to inflate for an accurate reading, and (b) it helps avoid missing an auscultatory gap (a silent interval that can occur in hypertensive patients, which could cause underestimating systolic or diastolic pressure if not anticipated). If a patient’s baseline BP is known, you may choose to skip this step; however, it’s best practice especially for initial examinations.
10. Position the stethoscope’s diaphragm (or bell) firmly over the brachial artery without touching the cuff.
Ensure the earpieces are pointed forward in your ears and the diaphragm (or bell) of the stethoscope is placed directly over the brachial artery at the antecubital space. Do not put the stethoscope under the cuff; it should rest just below the cuff edge, on bare skin. Hold it in place with light but firm pressure (excess pressure with the bell can distort sounds). Good placement ensures clear detection of Korotkoff sounds. Touching the cuff can introduce noise.
11. Quickly inflate the cuff to 20–30 mmHg above the palpated systolic estimate.
Close the valve on the inflation bulb completely (turn clockwise until snug, not overly tight). Quickly inflate the cuff to about 30 mmHg above the estimated systolic level you found by palpation (or above the point of the last heard sound if repeating). Inflating too high unnecessarily can be uncomfortable for the patient, but under-inflating may cause you to miss the true systolic reading if there’s an auscultatory gap.
12. Deflate the cuff at a rate of 2–3 mmHg per second while listening for Korotkoff sounds.
Open the valve slowly to deflate the cuff at a controlled rate of about 2–3 mmHg per second. This slow, steady release is critical.
13. Identify Korotkoff sounds.
As the cuff pressure falls, listen for the characteristic sounds (Korotkoff sounds) in the brachial artery. Note the manometer reading when you hear the very first tapping sound—this is the systolic pressure. Continue listening as the cuff deflates. The sounds will change in quality (described in detail in the Korotkoff section below). Note the reading when the sounds become muffled or disappear completely—in adults, the point of complete disappearance of sound is the diastolic pressure. (If sounds muffle and don’t completely stop, some clinicians record this muffling as diastolic, but standard practice is to use the disappearance in adults. In children, Phase 4 muffling is often used as the diastolic measure.) Be attentive for an auscultatory gap—if the sounds briefly fade out and then return, do not mistake the return of sounds as the systolic start; your palpation step should have prevented that error.
14. Complete deflation. Once the last sound is heard, open the valve fully to release the remaining air and remove the cuff from the arm. If you need to repeat the measurement (e.g., the sounds were unclear or the reading was unexpected), wait about 1–2 minutes before rechecking.
This allows blood flow to normalize in the arm and avoids venous congestion, which could skew the next reading. Waiting is especially important if multiple readings are needed.
15. After measurement, clean the earpieces and diaphragm of the stethoscope (if reuse between patients) and perform hand hygiene.
Cleaning the stethoscope’s earpieces and diaphragm after use helps prevent the transmission of pathogens between patients, supporting infection control standards. Stethoscopes can carry bacteria if not disinfected properly, posing a risk for healthcare-associated infections. Performing hand hygiene afterward further reduces the spread of microorganisms and reinforces the nurse’s commitment to safe, evidence-based practice.
16. Record BP as systolic/diastolic in mmHg, the arm used, patient position, and any observations (e.g., “Right arm, seated, BP 120/78 mmHg”).
Document the reading in the patient’s chart, noting the systolic over diastolic (e.g., 118/76 mmHg), the limb used (right or left arm), patient position (if not sitting), and any noteworthy circumstances (e.g., patient pain or anxiety, which might affect BP). If an abnormal reading was obtained, follow your facility protocol—usually, verify by taking another reading after a few minutes or using the other arm, and inform the healthcare provider if hypertension or hypotension is confirmed.
Tips for Taking Manual Blood Pressure Measurement
Accurate manual blood pressure measurement requires careful technique and attention to detail. Small factors in the environment, equipment, and patient preparation can significantly affect your readings. Use the following tips to help ensure consistency and reliability every time you measure blood pressure manually.
- Ensure the environment is quiet so low Korotkoff sounds can be clearly heard.
- Use the correct cuff size or an alternative site (e.g., thigh or pediatric cuff) if the arm is too large or too small.
- Avoid pressing the stethoscope too firmly against the skin, as this can muffle sounds.
- Confirm the stethoscope is working properly and the cuff is positioned correctly if sounds are difficult to hear.
- You may have the patient open and close their fist or briefly raise the arm above heart level, but use these maneuvers judiciously.
- Use the same arm for repeat measurements when possible.
- Make sure the patient is rested and has avoided caffeine, exercise, or smoking for at least 30 minutes before measurement.
- Take multiple readings if necessary and average them for a more accurate result.
2. Automated Blood Pressure Monitoring
Automated blood pressure monitoring is a common and convenient method for obtaining quick, repeatable blood pressure readings using an electronic device. Although simple to operate, it still requires careful preparation and technique to ensure accuracy and patient safety. Below is a clear, step-by-step guide for nurses to follow when performing automated blood pressure measurement.
1. Check the healthcare provider’s order for frequency and specific instructions. Verify the patient’s identity using two identifiers (e.g., name and date of birth).
Ensures the correct patient is assessed at the right time. Confirms that the procedure aligns with the care plan, avoiding errors.
2. Collect an appropriately sized automatic BP monitor with a functional battery or power source and ensure the cuff fits the patient’s arm.
An incorrect cuff size can cause inaccurate readings—too small can give a falsely high BP; too large can underestimate it. A working device is essential for reliable measurement.
3. Wash hands thoroughly according to infection control protocols.
Prevents the spread of microorganisms and ensures patient safety during close contact.
4. Introduce yourself, explain what you will do, and inform the patient that the cuff will inflate tightly around the arm but will not cause harm.
Reduces patient anxiety and promotes cooperation. Understanding what to expect helps prevent movement that could interfere with readings.
5. Ensure the patient is comfortable and that privacy is maintained by closing doors or curtains.
Supports patient dignity and helps them stay relaxed and still—movement or stress can temporarily elevate BP.
6. Seat the patient comfortably with back supported, feet flat on the floor, and legs uncrossed. The arm should be bare, supported at heart level, palm up, and relaxed.
Crossed legs or unsupported arms can increase BP. Arm at heart level prevents false high or low readings due to hydrostatic effects.
7. Wrap the cuff evenly and snugly on the upper arm, about 1 inch (2–3 cm) above the antecubital fossa. Ensure the artery marker aligns with the brachial artery.
Proper placement ensures accurate inflation and detection of arterial flow for correct BP readings.
8. Place the device on a stable surface where you can see the display clearly. Make sure tubing is not kinked or pulled tight.
Prevents device error and ensures you can monitor the measurement process for any issues.
9. Ask the patient to sit quietly, not to talk or move during measurement.
Movement and talking can interfere with the automatic reading and give false high results.
10. Press the start button and observe the monitor while the cuff inflates and deflates automatically.
Allows you to check for device malfunctions or signs of patient discomfort during the process.
11. Monitor the patient for discomfort, excessive cuff pressure, or unexpected error codes on the device.
Ensures patient safety and that you can respond quickly if the device fails or the patient experiences pain.
12. If the first reading seems inconsistent with the patient’s condition, wait 1–2 minutes and repeat.
Allows the arm’s blood flow to return to normal between measurements, improving accuracy.
13. Carefully remove the cuff and help the patient get comfortable.
Promotes comfort and prevents skin irritation or pinching.
14. Wipe down the cuff and monitor according to facility policy and manufacturer’s guidelines.
Prevents cross-contamination between patients and prolongs the equipment’s life.
15. Wash hands thoroughly after the procedure.
Maintains infection control standards and patient safety.
16. Record the BP reading in mmHg, arm used, patient’s position, device used, and any relevant observations (e.g., “Left arm, seated, automated BP: 124/78 mmHg, patient calm, legs uncrossed”).
Complete documentation ensures accurate records for ongoing care, trending, and decision-making.
Tips for Taking Automated Blood Pressure Measurement
Accurate automated blood pressure monitoring depends not only on the machine, but also on proper technique and practical precautions. Below are essential tips with explanations to help nurses and patients ensure reliable results every time:
- Always Compare Readings. If an automated BP reading is unusually high or low, verify it with a manual measurement. Automated machines can be affected by movement, arrhythmias, or cuff placement, so cross-checking helps ensure accuracy.
- Teach Proper Home Use. Instruct patients on how to position the cuff correctly, sit calmly, and rest before taking a reading at home. Many errors happen because patients don’t follow correct technique, which can lead to misinterpretation of their blood pressure trends.
- Follow Maintenance and Calibration Policies. Ensure the BP machine is checked regularly according to facility protocols. Inaccurate readings may result from devices that are poorly maintained or out of calibration, so routine checks maintain reliability.
- Check Cuff Fit and Placement. Use the correct cuff size and wrap it snugly on the upper arm at heart level. A cuff that’s too small or too loose can falsely elevate readings, while a too-large cuff can lower them inaccurately.
- Ensure Patient is Calm and Still. Have the patient sit quietly for at least 5 minutes before the measurement, feet flat on the floor, back supported, and arm at heart level. Talking, movement, or crossing legs can significantly alter blood pressure readings.
- Repeat if Needed. If an error message appears or the reading seems unusual, wait a minute and repeat the measurement. Automated monitors can occasionally give faulty readings due to motion or device error; repeating ensures validity.
3. Palpatory Method (Measuring BP by Palpation)
The palpatory method of measuring blood pressure relies on feeling the pulse to estimate BP, rather than listening with a stethoscope. This method is most commonly used to obtain an estimated systolic pressure or when Korotkoff sounds are difficult to hear (for example, in a very noisy environment, or if a stethoscope is not available). It can also be useful in patients with very low blood pressure or to avoid auscultatory gap errors. Below is a clear step-by-step process with rationale for safe and accurate practice:
1. Confirm any physician’s order for BP measurement and verify the patient’s identity using at least two identifiers (e.g., name and date of birth).
Ensures you are performing the procedure on the correct patient and in line with clinical needs.
2. Collect a properly sized BP cuff, sphygmomanometer, and ensure your hands are clean.
The right cuff size is critical for accuracy; clean hands help prevent infection transmission.
3. Wash or sanitize your hands and ensure privacy by closing curtains or doors.
Promotes infection control and protects patient dignity.
4. Have the patient seated or lying down with the arm supported at heart level, palm up. Make sure the arm is relaxed and clothing does not restrict circulation.
Proper positioning ensures accurate reading and patient comfort.
5. Find the radial pulse at the wrist using your index and middle fingers.
You need to know exactly where to feel for the pulse as the cuff deflates.
6. Wrap the cuff snugly around the upper arm, about 2–3 cm above the antecubital fossa (elbow bend). Ensure the bladder of the cuff is centered over the brachial artery.
Proper placement is essential for accurate compression and pulse detection.
7. Close the valve on the bulb and inflate the cuff until the radial pulse disappears, then continue inflating 20–30 mmHg higher to ensure you have fully occluded the artery.
This identifies the point at which blood flow stops, setting the baseline for the systolic estimate.
8. Slowly release the air (2–3 mmHg per second) and feel for the return of the radial pulse. Note the gauge reading when you first feel the pulse return—this is the palpated systolic pressure.
A slow, steady deflation allows you to detect the exact moment blood flow resumes.
9. Once you have your measurement, release the remaining air and remove the cuff.
Promotes comfort and prevents unnecessary arm pressure.
10. Wash your hands and document the palpated systolic pressure clearly (e.g., “BP by palpation: 110/P” — the “P” means palpated). Include the arm used and patient position.
Accurate documentation communicates important assessment information to the healthcare team.
When you use the palpatory method, you inflate the cuff while feeling for the radial pulse (at the wrist). As the cuff inflates, it squeezes the artery shut—so the blood flow stops—and you will feel the radial pulse disappear under your fingers. The pressure reading on the gauge at the point when the pulse disappears shows you that the artery is completely occluded.
However, the actual systolic pressure is found when you slowly deflate the cuff and feel for the pulse to reappear. That first point where you feel the pulse again indicates the pressure at which the heart’s pumping force is just strong enough to push blood through the compressed artery. This is your palpated systolic pressure.
In practice, sometimes your touch may detect the return of the pulse a few mmHg higher or lower because of slight variation in your hand sensitivity or how slowly you deflate the cuff. So if you felt the pulse disappear at 100 mmHg during inflation but you only felt it return at 105 mmHg during deflation, you would use 105 mmHg as your palpated systolic pressure.
Tips for Using the Palpatory Method
When using the palpatory method to measure blood pressure, a few simple tips can help ensure your readings are as accurate and reliable as possible. This method is especially useful when Korotkoff sounds are difficult to hear or when equipment is limited. Below are practical reminders every nurse or healthcare provider should keep in mind to perform this technique correctly and confidently:
- Use the correct cuff size for accurate results.
- Keep the patient’s arm supported at heart level.
- Find the radial pulse with your fingertips (not your thumb).
- Inflate the cuff 20–30 mmHg above where the pulse disappears.
- Deflate the cuff slowly and steadily.
- Never use your thumb to feel the pulse.
- Repeat the measurement if the pulse is faint or unclear.
- Document only the palpated systolic as “systolic/P” (e.g., 104/P).
- Tell the patient what you’re doing to help them relax.
- Use palpation first if Korotkoff sounds are hard to hear.
4. Doppler Method
The Doppler ultrasound method is used when pulses are faint or Korotkoff sounds are inaudible—such as in patients with severe hypotension, peripheral vascular disease, or obesity. It amplifies blood flow sounds, allowing you to detect systolic pressure more reliably. Below is a step-by-step guide to help nurses perform this method safely and effectively:
1. Check the medical order to confirm BP measurement frequency, site, and any specific instructions.
Ensures safe, appropriate care and compliance with clinical protocols.
2. Collect a Doppler device with gel, BP cuff, stethoscope (optional), and alcohol wipes.
Having all tools ready prevents delays and ensures the procedure runs smoothly.
3. Wash hands thoroughly and explain the procedure briefly to the patient. Provide privacy by closing curtains or doors.
Reduces infection risk and maintains patient comfort and dignity.
4. Have the patient lie down or sit with the arm at heart level, palm up, and supported. Expose the chosen artery site (brachial, radial, or popliteal).
Proper positioning promotes accurate BP measurement and clear Doppler signal detection.
5. Wrap the cuff snugly around the limb, about 2–3 cm above the site where you will place the Doppler probe.
Correct cuff placement ensures proper inflation and accurate pressure readings.
6. Place a small amount of ultrasound gel over the artery site.
The gel eliminates air between the probe and skin, improving sound transmission.
7. Turn on the Doppler device and hold the probe at a 45-degree angle over the artery with light pressure until you hear a clear whooshing sound of blood flow.
Light, correct placement maximizes sound clarity and avoids occluding the vessel.
8. While listening, inflate the cuff 20–30 mmHg above the point where the blood flow sound disappears.
This stops blood flow, which is necessary to find the systolic point when deflating.
9. Slowly deflate the cuff while listening for the return of the Doppler sound. Note the pressure at which the sound reappears—this is the systolic pressure.
A slow release ensures you accurately detect the first return of flow.
10. Remove any remaining gel from the patient’s skin and the Doppler probe using wipes.
Maintains patient comfort and keeps equipment clean for future use.
11. Record the systolic BP, the limb and site used, the Doppler method, and any relevant observations. Example: “Doppler BP: Right arm, brachial, 90/P mmHg.”
Clear documentation provides a complete record for the care team and supports trends in patient monitoring.
Tips for Using the Doppler Method
The Doppler method helps nurses measure systolic blood pressure when sounds are hard to hear. Use these quick tips to make the procedure easier and more accurate:
- Use enough gel to get a clear sound.
- Hold the probe at a 45-degree angle.
- Press lightly—don’t squash the artery.
- Find the pulse before inflating the cuff.
- Keep the room quiet.
- Inflate the cuff 20–30 mmHg past where the sound stops.
- Deflate the cuff slowly to catch the return of the sound.
- Remember: Doppler gives systolic only—write it as “120/P.”
- Clean the probe and patient’s skin after use.
- Repeat if needed to check accuracy.
5. Ambulatory and Home Blood Pressure Monitoring
Ambulatory and home BP monitoring allow patients to measure blood pressure outside the clinic to get a more accurate picture of their usual BP throughout the day and night. This helps detect white-coat hypertension or masked hypertension that might not show up during office visits. Nurses play a key role in educating patients to use these methods correctly for reliable results.
1. Verify physician order (if required).
Confirms that monitoring is appropriate for the patient’s condition and meets clinical guidelines.
2. Explain the purpose and procedure to the patient.
Patients must understand why frequent BP checks are needed to ensure cooperation and accurate results.
3. Select the right device.
Make sure the patient has a validated, properly sized, automated BP monitor or ambulatory device for home use.
4. Teach proper cuff placement.
Incorrect placement is a common cause of inaccurate readings. The cuff should be snug, level with the heart, and positioned on a bare arm.
5. Instruct on correct body position.
Patients should sit with back supported, feet flat on the floor, and arm at heart level to reduce measurement error.
6. Explain how often and when to measure.
Readings are often taken twice in the morning and evening for several days. Ambulatory monitors record automatically over 24 hours.
7. Remind to avoid certain activities before measuring.
Patients should rest quietly for 5 minutes before checking BP and avoid caffeine, smoking, or exercise 30 minutes beforehand.
8. Show how to record or transfer results.
Teach patients to log readings accurately or ensure they know how to download or share device data with their provider.
9. Discuss when to report abnormal results.
Patients should know which readings are too high or low and when to contact their healthcare provider.
10. Document education provided.
Note that teaching and demonstration were done. This ensures continuity of care and accountability.
Tips for Patients Using Home or Ambulatory BP Monitors
When patients monitor their blood pressure at home or with an ambulatory device, a few simple tips can help ensure their readings are accurate and useful. Clear instructions and reminders support reliable results and help patients feel confident using their equipment. Below are key tips to share with patients for successful self-monitoring:
- Use a validated device. Always choose a blood pressure monitor that has been tested for accuracy (look for AHA or international validation listings). Use an upper-arm cuff monitor—wrist and finger devices are less reliable.
- Check cuff size and placement. Use the correct cuff size for your arm circumference. Wrap the cuff snugly on bare skin, about an inch above the elbow crease, with the tubing positioned over the brachial artery.
- Rest properly before measuring. Sit quietly for at least 5 minutes before taking a reading. Rest your arm supported at heart level, feet flat on the floor, and back supported.
- Avoid common factors that affect readings. Don’t smoke, drink caffeine, or exercise within 30 minutes before measuring your blood pressure. Stay calm and don’t talk while measuring.
- Take multiple readings. Take at least two readings, one minute apart, and record the average. For home monitoring, measure at the same time(s) each day (morning and evening are typical).
- Keep a log or use the device’s memory. Write down your results, including date, time, and any factors that might have affected the reading (stress, pain, or activity). Share your log with your healthcare provider.
- Follow provider instructions for ambulatory monitoring. If wearing a 24-hour ambulatory BP monitor, keep the cuff on at all times (unless instructed otherwise). Stay still with your arm relaxed when the cuff inflates, and keep a diary of activities and symptoms.
- Bring your monitor to appointments. Bring your home BP device to medical visits so your nurse or provider can check its accuracy and your technique.
Interpretation of Readings and Blood Pressure Categories
Blood pressure is recorded as “systolic/diastolic” in millimeters of mercury (mmHg). Interpreting these readings involves both identifying the correct values during measurement and understanding what those values mean for the patient’s health.
Identifying Systolic vs. Diastolic
During a manual reading, the systolic pressure is the point at which you first hear the Korotkoff sound (Phase 1) as the cuff deflates—this marks the pressure when the heart’s contraction forces blood past the cuff. The diastolic pressure is identified when the Korotkoff sounds disappear (Phase 5)—the pressure when the artery is no longer compressed and blood flow is smooth during heart relaxation. In practice, these correspond to the top (systolic) and bottom (diastolic) numbers of the BP reading. For example, if tapping sounds start at 128 mmHg and disappear at 76 mmHg, the BP is recorded as 128/76. (In some children and certain conditions, muffling of the sound is noted as an earlier diastolic point, but for adults, use the disappearance unless instructed otherwise.)
Units
Remember that BP is measured in mmHg. Always write down the units and ensure both numbers are recorded. If any aspect of the reading was unusual (e.g., an auscultatory gap was present, or the reading required palpation), make a note of it in documentation.
Once blood pressure is measured, it’s important to interpret whether it falls within the normal range, is elevated, or indicates hypertension. Below are the current adult blood pressure categories according to the 2017 ACC/AHA Hypertension Guideline, which is now widely used in practice:
| Category | Systolic (mmHg) | Diastolic (mmHg) |
|---|---|---|
| Normal | Less than 120 | AND less than 80 |
| Elevated | 120–129 | AND less than 80 |
| Hypertension Stage 1 | 130–139 | OR 80–89 |
| Hypertension Stage 2 | 140 or higher | OR 90 or higher |
| Hypertensive Crisis | Higher than 180 | AND/OR higher than 120 (requires immediate medical attention) |
Key points:
- BP should be measured on at least two separate occasions, ideally on different days, to confirm a diagnosis.
- Normal BP means the person’s cardiovascular risk is generally low if other factors are healthy.
- Elevated BP is higher than ideal but not yet in the hypertension range; lifestyle changes are strongly recommended to prevent progression.
- Stage 1 Hypertension often calls for lifestyle changes plus possible medication if cardiovascular risk is elevated.
- Stage 2 Hypertension usually requires both lifestyle changes and medication.
- A Hypertensive Crisis is a medical emergency if accompanied by signs of organ damage (e.g., chest pain, stroke symptoms).
Hypotension (Low BP)
Unlike hypertension, hypotension does not have strict cut-offs but is generally defined by low BP that causes symptoms or indicates poor perfusion. Typically:
- Systolic BP < 90 mmHg or diastolic BP < 60 mmHg is considered hypotensive for most adults.
- However, what’s “low” depends on the person’s usual BP. For example, athletes or healthy young adults may naturally have BP around 90/60 mmHg with no symptoms—this is normal for them.
- If low BP causes dizziness, fainting, weakness, or signs of shock, it’s clinically significant and requires further evaluation.
Orthostatic (Postural) Hypotension
Orthostatic hypotension is still defined as:
- A drop of ≥20 mmHg systolic or ≥10 mmHg diastolic within 3 minutes of standing, compared to BP when lying down.
- It is usually accompanied by symptoms like dizziness, lightheadedness, or syncope (fainting).
- Nurses check for this by measuring BP and heart rate lying, then sitting or standing. It is common in older adults, dehydrated patients, and those on BP-lowering meds or diuretics.
Korotkoff’s Sounds (Phases of Blood Pressure Sounds)
Korotkoff sounds during a blood pressure measurement. As cuff pressure drops, the five phases (K1–K5) of sounds are heard, corresponding to changes in blood flow. The first tapping sound (Phase 1) indicates systolic pressure, and the disappearance of sound (Phase 5) indicates diastolic pressure.
When you measure blood pressure using a stethoscope, the sounds you hear are called Korotkoff’s sounds, named after Dr. Nikolai Korotkoff who first described them. These sounds are produced by turbulent blood flow in the artery as the cuff pressure changes. There are five phases of Korotkoff sounds:
Phase 1 (K₁)
The first appearance of clear, tapping sounds. This tapping corresponds to the pulse surging through the partially compressed artery. The first tap you hear indicates the systolic pressure—the pressure at which blood just begins to flow in the artery as cuff pressure falls below peak systolic pressure. Initially, the sound may be faint, but it’s a sharp tapping or thud.
Phase 2 (K₂)
The sounds become softer and swishing in quality. The blood flow is increasing in the artery, and you hear a murmur or whooshing noise as turbulence changes with each heartbeat. This phase happens as the cuff is further deflated, between systolic and diastolic pressures.
Phase 3 (K₃)
The sounds become crisper and louder again, often described as a thumping noise. This occurs as the artery opens more and blood flow approaches a less turbulent state than Phase 2, but still with some turbulence creating loud taps. K₃ sounds are sometimes as sharp as Phase 1 but with a higher volume of blood flow.
Phase 4 (K₄)
The sounds take on a muffled, soft, blowing quality. The blood flow is becoming more laminar (smooth) as the cuff pressure nears diastolic pressure. In Phase 4, the sound volume decreases significantly. This phase is important because in some patients (especially children and some adults), the sounds might muffle and not fully disappear—making it tricky to decide diastolic pressure. Traditionally for adults, we don’t record Phase 4, but in pediatrics, the muffling point is often taken as the diastolic BP (because children’s Korotkoff sounds can be audible until zero).
Phase 5 (K₅)
Silence. This is when the sounds completely disappear as the cuff pressure drops below the diastolic pressure and blood flow becomes fully smooth (no turbulence). The pressure at which the last sound is heard (right before silence) is recorded as the diastolic pressure. In most adults, the change from Phase 4 to Phase 5 (muffling to silence) is clear.
Below is a Korotkoff sounds summary in a clear, easy-to-read table format for quick reference:
| Korotkoff Phase | Description | Significance |
|---|---|---|
| Phase 1 (K₁) | First appearance of clear, sharp tapping sounds. | Indicates systolic pressure—the point where blood just starts to flow through the compressed artery. |
| Phase 2 (K₂) | Sounds become softer, swishing, or whooshing. | Turbulent blood flow as cuff deflates between systolic and diastolic pressures. |
| Phase 3 (K₃) | Sounds become crisper and louder, like louder tapping or thumping. | Blood flow is less turbulent than K₂ but still not fully smooth. |
| Phase 4 (K₄) | Sounds take on a muffled, soft, blowing quality. | Blood flow becomes smoother; muffling sometimes used for diastolic in children. |
| Phase 5 (K₅) | Complete disappearance of sounds (silence). | Indicates diastolic pressure in most adults—point where blood flow is smooth, without turbulence. |
It’s worth noting that in some cases, there is no distinct Phase 5 because sounds continue to zero—this can happen in high cardiac output states (fever, pregnancy) or severe aortic regurgitation. In those cases, some clinicians use Phase 4 (muffling) as the recorded diastolic. If you ever encounter that, you might chart something like “BP 130/—/70 mmHg (Phase 4 muffling at 70, sounds never disappeared)”. But such situations are rare, and usually Phase 5 is detectable.
Understanding Korotkoff sounds is crucial for accurate manual BP measurement. Proper technique (as described earlier) will help you hear them clearly. If you deflate too quickly, you might miss some sounds; if too slowly, the arm can become congested and sounds hard to discern. That’s why ~2 mmHg per second deflation is recommended.
Korotkoff sounds can also tell us more than just numbers: an auscultatory gap, for example, is observed when Phase 1 sounds start, then disappear for a time, then reappear (Phase 2). If one is not careful, an auscultatory gap could be mistaken for the diastolic point, causing a large underestimation of systolic BP. Always use the palpation method to detect the true systolic beforehand to avoid this pitfall, and listen throughout the deflation until well below diastolic to ensure you catch the reappearance if a gap is present. Document if you notice an auscultatory gap (e.g., “auscultatory gap from 140 to 120 mmHg”).
In summary, Korotkoff sounds guide us in pinpointing systolic and diastolic pressures. With practice, you will become proficient at recognizing each phase. The chart above provides a visual representation of how these sounds manifest as the cuff pressure drops across the patient’s true systolic and diastolic pressures.
Common Errors in Blood Pressure Measurement (and How to Avoid Them)
Even small mistakes in technique can lead to significant errors in BP readings. It’s important to be aware of these common errors and how to prevent them. The table below (adapted from Kozier’s Fundamentals) summarizes errors, their effect on the reading, and ways to avoid them:
| Error in Technique | Effect on Reading | How to Avoid |
|---|---|---|
| Cuff too narrow or small | Falsely HIGH reading | Use appropriate larger cuff (bladder width = ~40% of arm, length = 80% of arm) |
| Cuff too wide or large | Falsely LOW reading | Use a correctly sized smaller cuff for the arm |
| Cuff wrapped too loosely or unevenly | Falsely HIGH reading | Wrap cuff snugly, with equal tension, removing bulky clothing |
| Arm unsupported (hanging down) | Falsely HIGH reading | Support the arm at heart level (use a table or pillow) |
| Arm positioned above heart level | Falsely LOW reading | Keep the cuff at the level of the heart (mid-sternum) |
| Arm positioned below heart level | Falsely HIGH reading | Same as above—adjust arm to heart level |
| Insufficient rest before measurement (patient not relaxed) | Falsely HIGH | Have patient sit quietly for 5 minutes before taking BP |
| Repeating measurement too quickly (no rest between) | False HIGH systolic or false LOW diastolic | Wait 1–2 minutes between repeated measurements on the same limb |
| Deflating cuff too quickly | False LOW systolic and false HIGH diastolic | Deflate slowly (~2–3 mmHg per second) to hear onset and disappearance of sounds clearly |
| Deflating cuff too slowly | False HIGH diastolic (venous congestion) | Do not pause or excessively slow the deflation; maintain recommended rate |
| Stethoscope pressure too firm on artery | False LOW diastolic (sounds persist) | Apply stethoscope with light pressure (especially bell) |
| Failure to detect auscultatory gap | False LOW systolic or false LOW diastolic | Use palpation to estimate systolic first; listen thoroughly until cuff fully deflated |
| Observer error (e.g., parallax misreading gauge, rounding) | Varies (can be high or low) | Get at eye level with aneroid gauge; use automated devices if unsure; practice for consistency |
| Cuff over clothing or rolled sleeve that’s tight | Falsely HIGH reading (or no sound) | Wrap cuff on bare arm whenever possible (clothing can muffle sounds and add resistance) |
Table: Common BP measurement errors, their effects, and prevention. Each of these errors can be avoided with careful attention to technique. For instance, using the correct cuff size and placement is one of the most important factors (as highlighted earlier). Also, ensure the patient is prepared: a few minutes of rest, no recent exercise or caffeine, feet flat, no talking during the measurement, etc. Even having a full bladder can add as much as 10–15 mmHg to a BP reading, so consider having the patient use the restroom before measurement!
Why it matters. Small technique issues can lead to diagnosing a patient with “hypertension” when in fact their BP is normal, or missing a truly high BP. For example, if a patient is anxious and talking, with legs crossed and arm dangling, their reading might come out falsely high. By correcting those factors (calming the patient, proper positioning), you might find their BP is actually lower. Always aim for the most accurate reading by controlling these variables.
In summary, follow the proper procedure and be mindful of potential errors. If you get an unusual result, consider if any factor could have skewed it and re-check the BP under better conditions. Patient factors (stress, pain, recent smoking) can also temporarily raise BP, so interpret readings in context.
Lifespan Considerations: Infants, Children, and Older Adults
Blood pressure assessment techniques and “normal” ranges vary across the lifespan. Here are special considerations for infants, children, and older adults in relation to BP:
Infants (Birth to 1 year)
Routine BP measurement is not usually done on healthy infants under 3 unless there is a medical indication, because it can be technically difficult and normals are much lower than adults. If needed, use an appropriate small cuff (there are neonatal and infant cuff sizes) and a pediatric stethoscope (with a smaller diaphragm) to hear the tiny Korotkoff sounds. The cuff may need to be placed closer to the elbow (antecubital space) due to the short arm length. If manual auscultation is too hard, use the palpation method or a Doppler device to obtain systolic pressure. For infants, the thigh and arm BPs are roughly the same (arm and thigh pressures are equivalent in children <1 year). A newborn’s systolic BP is around 70 mmHg on average at birth and rises in the first month; such low values are normal for a neonate. Because of the challenges, BP in infants is often measured only if there’s a concern (e.g., in NICU or if heart defects are suspected). When measuring, it may be easier with the infant calm—sometimes taking BP while the baby is asleep is ideal. Also, crying can transiently raise an infant’s BP, so try to soothe the baby before measurement.
Children (Toddler to Adolescence)
Begin routine BP checks at age 3 during pediatric visits, or younger if the child has risk factors (prematurity, congenital heart/kidney issues, etc.). Use an appropriate pediatric cuff; the bladder width should be ~40% of the upper arm circumference (same sizing principle). Explain the procedure to the child in simple terms to reduce fear—for example, “I’m giving your arm a little hug to see how strong your heart pumps”—and consider demonstrating on a doll or on the child’s other arm so they know what to expect. Children might be scared of the inflation squeeze; addressing this with a calm approach is important. For children under about 3, you may need to use the palpation method or an electronic device, since their arteries are small and they may not tolerate the stethoscope exam quietly. When auscultating in children, note that Korotkoff sounds can be heard down to 0 mmHg in some kids, so often the muffling of sound (Phase 4) is taken as the diastolic reading in children rather than the disappearance. Make sure the child is not crying or agitated, as that will elevate the BP reading. Normal pediatric BPs vary with age, sex, and height percentiles—they are lower than adult values and gradually increase with age. A quick rule of thumb for a “normal” systolic in children aged 1–7 is ~90 + (2 × age in years); for age 8–18, use ~83 + (2 × age), but these are very rough estimates. Always compare to pediatric BP percentile charts for accuracy. One more note: In children, arm vs. thigh BP may differ by about 10 mmHg (thigh higher) after infancy, so use the same site for consistent monitoring.
Older Adults
Aging can affect blood pressure in several ways. Arteries may stiffen (leading to higher systolic pressures), and baroreceptor sensitivity (which helps regulate BP with position changes) decreases, contributing to orthostatic hypotension risk. When measuring BP in an older person, be mindful that their skin may be fragile and prone to bruising—do not over-inflate the cuff or leave it inflated longer than necessary. If they have an arm contracture or cannot have the arm positioned correctly, you may use forearm or wrist measurements or palpation as needed. Many older adults are on blood pressure medications; ask when they last took their antihypertensives, as this can affect the reading (for example, if they took it an hour ago, their BP might be at a low point). Because of the higher likelihood of orthostatic hypotension in this group (due to medications or decreased vascular elasticity), it’s often recommended to check BP lying, sitting, and standing for the elderly if dizziness is reported. Always assist them when they change positions during BP measurement to prevent falls. Also, consider that anxiety in a clinical setting (white-coat effect) might elevate their readings; ensure they are calm and give a few minutes seated rest. Gently explain each step, as some older adults might be unfamiliar with the automated machines or might be startled by the cuff inflation if not warned.
Normal aging vs. disease
Remember that “normal” BP targets for older adults may be a bit higher than for young adults (due to arterial changes), but generally we still aim for < 130/80 in most hypertensive older patients, unless dizziness or side effects necessitate a higher target. Always individualize evaluation—an older adult with fragile health might experience side effects from aggressive BP lowering, so sometimes a slightly higher goal is set by providers. However, measurement technique remains the same careful process for accuracy.
Clinical Alerts and Best Practices for Accurate Measurement
Finally, here are some clinical tips, precautions, and best practices to ensure blood pressure is measured safely and accurately:
Do Not Use a Restricted Limb. Certain conditions contraindicate using an arm for BP. Avoid taking BP on an arm that has: an IV infusion or blood transfusion running, an arteriovenous (AV) fistula for dialysis, or on the side of a mastectomy or lymph node dissection (due to risk of lymphedema). Also, avoid an injured or casted arm. In these cases, use the other arm or a thigh measurement. Always inquire if the patient has a preference or any medical history that limits an arm—many will have a sign above the bed or a bracelet indicating “No BP on left arm,” for example.
Observe for Orthostatic Hypotension. If a patient is dizzy or at risk for falls, consider measuring orthostatic BPs (lying, sitting, standing) as described earlier. A drop in BP upon standing is a red flag for fall risk. Ensure the patient changes position slowly, and use assistance. If a significant drop is measured, keep the patient seated or lying and notify the provider. Educate at-risk patients to rise slowly from bed or chairs.
Ensure a Quiet Environment. Background noise or a patient talking can make it hard to hear Korotkoff sounds and can also inadvertently raise the BP. The patient should be instructed not to talk during the measurement. In fact, talking can raise the systolic reading by ~10 mmHg. If you have difficulty hearing, double-check that the stethoscope is placed correctly and that its head is turned to the correct side (diaphragm vs. bell). Sometimes switching to the bell can help for low-pitched sounds (Phase 4 diastolic), or vice versa, depending on your stethoscope and the patient.
Patient Comfort and Timing. Pain, anxiety, or discomfort can acutely raise BP. If a patient is in pain or distress, address that or note it, as their BP might be elevated due to pain/stress. Similarly, if the patient just smoked or had caffeine within 30 minutes, their BP might be temporarily elevated. Follow guidelines: ideally, BP is measured after the patient has rested at least 5 minutes, has not smoked or had caffeine for 30 minutes, and is seated calmly. In practice, do your best to approximate these conditions or at least document the circumstances (e.g., “BP taken immediately after patient walked down hallway”).
Multiple Readings. If an initial reading is high, best practice is to re-check after a few minutes. You might also check the other arm. A difference of up to ~5-10 mmHg between arms can be normal, but larger differences may indicate an issue (like subclavian artery stenosis). Use the arm that gives higher readings for subsequent measurements and note the difference. For diagnosing hypertension, guidelines often recommend averaging two readings taken 1-2 minutes apart. Automated office BP devices even take multiple readings automatically and average them.
Equipment Check. Ensure your aneroid manometer is calibrated (the needle should rest at zero when cuff is deflated). A mis-calibrated gauge can lead to systematic errors. Mercury sphygmomanometers (if used) should be properly maintained and upright. For electronic devices, make sure batteries are charged or fresh and that the device has been validated for accuracy. If an electronic reading seems off, always feel free to revert to a manual measurement for confirmation.
Safety: Don’t Overinflate Excessively. Inflating the cuff much beyond the necessary pressure can cause unnecessary pain and even petechiae (small red spots) on the arm. It can also risk damaging the brachial artery in extreme cases. That’s why we estimate systolic first—to know roughly how high to go. If the patient reports the cuff is too painful, deflate it—you may have inflated too high or too rapidly.
Cleaning and Hygiene. Wipe the cuff (especially if there’s any visible soil or if used on a patient with an infectious condition) according to facility infection control protocols. Stethoscope earpieces and diaphragm should be cleaned between patients to prevent cross-contamination.
Documentation and Reporting. Always record the blood pressure reading in the patient’s chart with the date and time. Note any position (if not sitting) or site (if not the left arm). If the BP is outside normal range, follow your facility’s protocol—this often means alerting the RN or physician if you are a student or if significantly high (e.g., systolic >180 or diastolic >120, hypertensive crisis) or low (symptomatic hypotension). Also observe the patient’s condition—BP is one piece of the puzzle. For instance, if you get a high reading but the patient shows no signs (and has a history of high BP), it may be chronic hypertension. But if a normally normotensive patient suddenly has a very high BP with symptoms like headache or chest pain, that’s urgent to report.
Special Situations. If standard arm measurement is not possible (bilateral arm injuries, etc.), you can use the forearm or even lower leg with appropriate cuffs. If using a forearm reading, place the cuff on the forearm and palpate or place the stethoscope over the radial artery. Note that forearm systolic readings can sometimes run higher than upper arm by ~5-10 mmHg, but it’s an acceptable alternative when needed. Just be consistent with site and method.
Patient Education. If you’re preparing a patient for home blood pressure monitoring, teach them these same principles: proper cuff placement, resting before measuring, no talking, etc. Misconceptions are common (such as a patient taking BP over clothing, or in a slouched posture). Educating them on technique can improve the reliability of home readings which they will report to their providers.
Clinical Alerts. Always take seriously an extreme BP or a significant change from baseline. If a patient’s systolic pressure is <90 and they have mental status changes, chest pain, or other symptoms, this could be shock—act promptly. If a patient’s BP is extremely high (e.g., >180/120) with symptoms (like severe headache, vision changes, confusion, or shortness of breath), this could be a hypertensive emergency; do not let them leave or remain unmonitored, call the provider immediately. Also, be cautious with orthostatic hypotension: if a patient complains of dizziness when standing, check their BP lying and standing—and ensure someone is with them when they mobilize. Many falls in healthcare settings happen due to orthostatic drops; prevention includes slow position changes and standby assist.
In conclusion, measuring blood pressure is a fundamental nursing skill that, while routine, requires attention to detail to ensure accuracy. By following proper procedures, using correctly sized equipment, understanding the physiology of Korotkoff sounds, and being mindful of common pitfalls, nurses can obtain reliable BP readings. These readings are often critical in guiding clinical decisions and ensuring patient safety, making competency in BP measurement essential for nursing practice. With practice and adherence to the guidelines above, nursing students and practicing nurses can master blood pressure assessment and contribute valuable data to the patient’s overall health evaluation.


Leave a Comment